![vCreative_Logo_RGB.png]](https://vcreativeinc.com/hs-fs/hubfs/vCreative_Logo_RGB.png?width=200&height=38&name=vCreative_Logo_RGB.png)
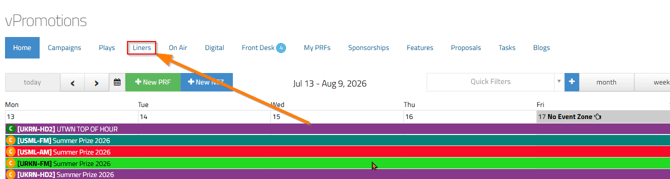
Selecting the Liners tab opens the Liners grid, where you can access a variety of tools and view available and scheduled liner slots. The grid displays the liner slot times created for the selected station. Liner You must create liner slots before you can schedule liners. Liner slots act as placeholders that tell vPromotions when liners can be scheduled. If you do not see any liner slot times after selecting the appropriate station, you most likely have not created liner slots yet. For more information, review the Available Liner Slots tutorial - HERE
First, let’s review the tools at the top of the Liners page.
This area contains several liner tools. You may need to adjust your browser zoom to see the image more clearly.
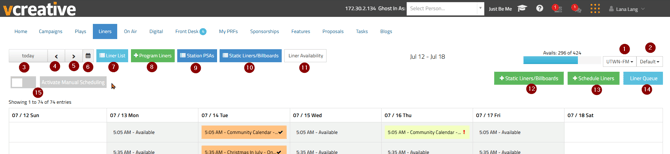
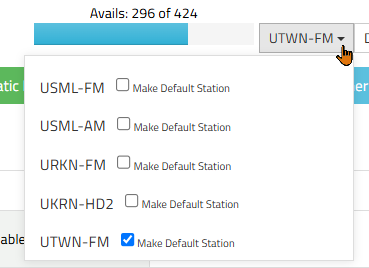
1. The Station Selector. When working with liners, first confirm that you have selected the appropriate station. Open the Station Selector to switch between stations. You can also select a station as your default. When you open the Liners tab, your default station will appear first.
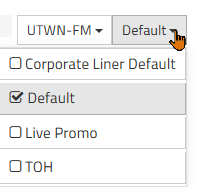
2. The Liner Category. If you have created custom liner categories, select the category you want to manage. If you have not created custom liner categories, the system will display the Default category. As with stations, you can select a default category. The liner grid will display the slot times associated with the selected category. You can view more than one category on the grid at the same time. To find out more about Custom Liner Slot Categories, review the article - HERE
3. Today. If you navigate to another date, select Today to return to the current week.
4. Backward arrow. If you want to view grid dates from the past you can use the back arrow to move back one week at a time.
5. Forward arrow. Use the forward arrow to move ahead one week at a time.
6. The jump to date. Use Jump to Date to select a specific date to display on the liner grid.
7. Liners List. The Liners List displays currently scheduled liners and their details.
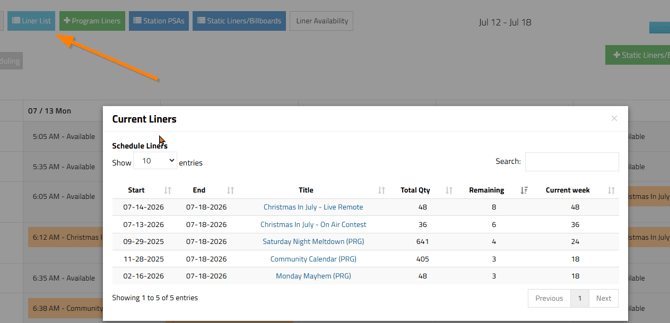
- Show entries - Adjust the list to display 10–100 liner entries.
- Search - Use the search field to quickly locate a liner in the list.
- Start - The Start column displays the liner’s first scheduled date.
- End - The End column displays the liner’s final scheduled date.
- Title - The Title column displays the liner’s name. A (PRG) label at the end of the title indicates that it is a Program Liner. A liner without this label was created within a PRF. The title appears as a blue link. Select it to open a list showing when the liner was or will be scheduled. For PRF liners, this is the same list view available within the PRF. The list view for a program liner is very similar. In the list view, you can see timestamps showing who marked the liner as read and when. Use the trash can icon to delete an individual liner. To delete multiple liners, select the checkboxes beside the scheduled liners and use the Bulk Actions tool in the upper-right corner of the page. The Edit tool allows you to apply a copy change to the current liner only, the selected liner and all future occurrences, or every occurrence of the liner.
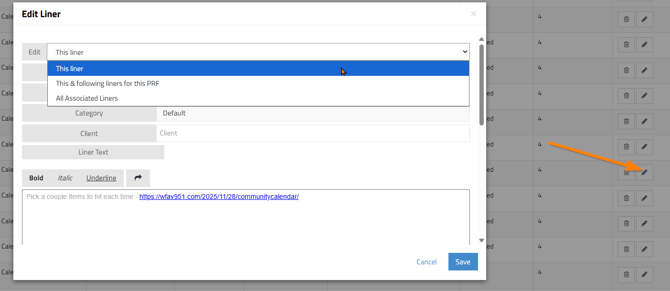
- Total Qty - Displays the total number of times the liner is scheduled to run.
- Remaining - Displays the number of scheduled liner occurrences that have not yet run. For example, the screenshot reflects the remaining quantities as of July 18, 2026. If the Monday Mayhem liner has three occurrences scheduled for July 18, the Remaining column will show 3. If three additional occurrences are scheduled for July 19, the Remaining column will show 6.
- Current Week - Displays the number of times the liner is scheduled to run during the current week.
8. +Program Liners. Use +Program Liners to create liners that are not associated with a PRF. Program Liners are created and scheduled in the same manner as PRF liners. Once scheduled, they will appear on the On Air tab. Program Liners can be used for programming content, such as ‘Check out our Sunday morning countdown show’ or ‘Download our app.’ For liners related to an existing promotion, we recommend creating them within the PRF. Liners created within a PRF remain associated with that PRF, providing easy access and visibility into all related elements. For more information on creating and scheduling liners click - HERE
9. Station PSAs. Use Station PSAs to view, create, and manage PSA liners. This feature is similar to Static Liners/Billboards, but it is used specifically for PSAs.
10. Static Liners/Billboards. Use Static Liners/Billboards to view, create, and manage static liners, billboards, and artist mentions. These liner types are designed for content that is not scheduled for a specific time. Instead, the content remains in a liner ‘holding tank’ that on-air staff can access as filler during their shows. For more information on Static Liners/Billboards and PSAs click - HERE
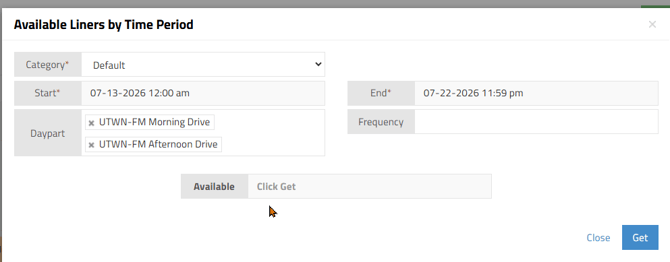
11. Liner Availability. Use Liner Availability to see how many open liner slots remain within selected date ranges or dayparts. For example, to see how many slots remain during morning or afternoon drive, select the appropriate options and click Get.

12. +Static Liners/Billboards. +Static Liners/Billboards is similar to the Static Liners/Billboards tool described in Item 10, but this button is used only to create new liners.
13. +Schedule Liners. This button is available only when the selected station uses Priority/Frequency-Based Liner Scheduling. Use this button to schedule liners that have been created and added to the Liner Queue. For more information on Priority/Frequency Based Liner Scheduling click - HERE
14. Liner Queue. You will see this button only if you are using Priority/Frequency Based Liner Scheduling for the station you have chosen. Use this button to view, manage, and edit liners after they have been created. For more information on Priority/Frequency Based Liner Scheduling click - HERE
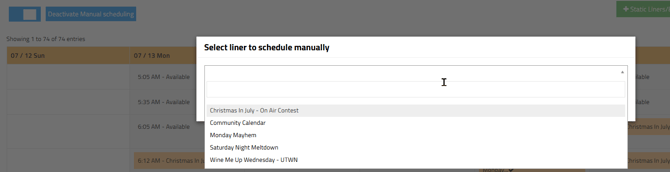
15. Activate Manual Scheduling. Activate Manual Scheduling allows you to place liners into available slots manually rather than having the system schedule them. This gives you control over the exact placement of each liner. After you select the button, it turns blue to indicate that Manual Scheduling is active. You can then select an open slot to display a dropdown menu of available liners. Select the preferred liner, and then click Insert to place it in the chosen slot. Select Deactivate Manual Scheduling to return to system scheduling.
16. Avails:. This tool provides a quick view of the open liner slots remaining within the selected time period.
17. Time Period. This displays the time period currently shown on the grid.
Next, let’s review the liner grid.
The grid displays available liner slots and scheduled liners. You can drag a scheduled liner to a different available slot. You can also drag one liner onto another scheduled liner to swap their positions.
Visual indicators:
- Orange liners represent PRF liners.
- Yellow liners represent Program Liners.
- A checkmark indicates that a liner has been marked as read.
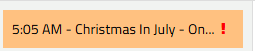
- An exclamation mark indicates that a liner is past due and has not been marked as read.
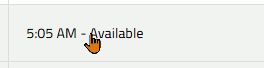
- A slot labeled Available does not currently contain a scheduled liner.
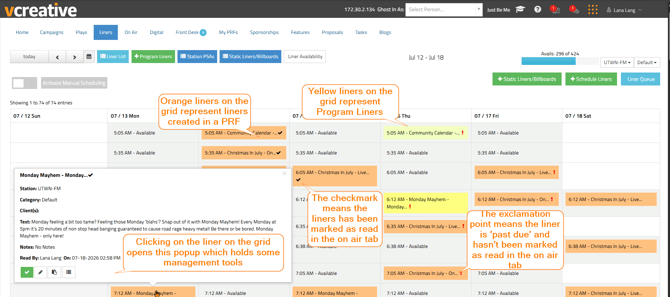
When you select a liner on the grid, a popover will appear. The popover displays basic information about the liner and provides several actions.
- Use the green checkmark to mark the liner as read.

- Use the pencil icon to edit the current occurrence, the selected occurrence and all future occurrences, or every occurrence of the liner.

- The copy icon allows you to copy the liner to your clipboard. The copied liner will appear in a floating area on the page. Hover over the floating liner to see instructions for placing it into an available slot. Select an available slot to paste the copied liner into that time.

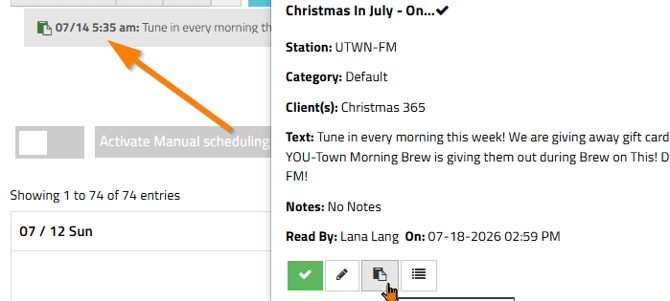
- The list all icon opens the liner’s list view. Select list all to open the liner’s list view, where you can review read timestamps and access editing, deletion, and bulk-action tools.

If you have any questions, please contact the vCreative Support Team by emailing support@vcreativeinc.com or calling 800-605-9889.