![vCreative_Logo_RGB.png]](https://vcreativeinc.com/hs-fs/hubfs/vCreative_Logo_RGB.png?width=200&height=38&name=vCreative_Logo_RGB.png)
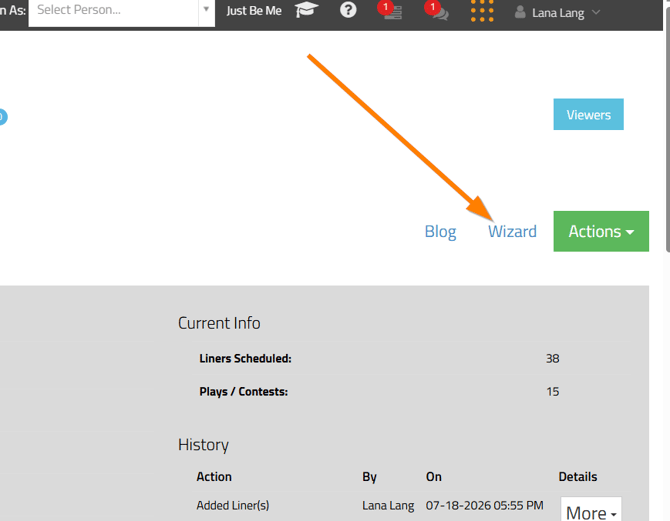
Select the wizard icon to open a list of the available setup steps.
The following sections provide an overview of each step in the Contest PRF Setup Wizard.
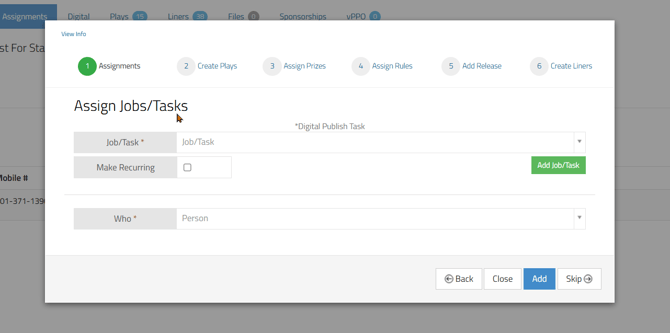
1. Assignments
The Assignments step allows you to assign jobs and tasks to members of your team. Jobs and tasks can be customized based on your organization’s needs.
For a complete tutorial on the Jobs/Tasks feature in vPromotions, select HERE 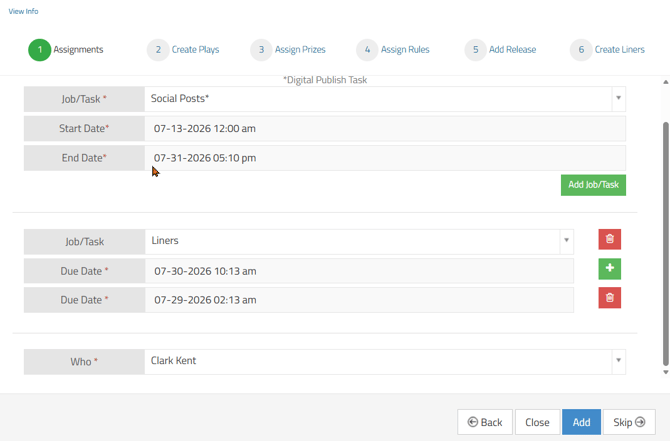
-
Job/Task
Use the Job/Task dropdown to select the job or task you want to assign.
You can also make a job or task recurring when it must be completed more than once. For example, someone assigned to create social media posts may need to complete that task several times throughout the promotion.
Select Add Job/Task to assign another job or task to the same person.
Select the green plus sign to add another due date or time for the job or task.
-
Who
Use the Who dropdown to select the person responsible for completing the assignment.
Some jobs and tasks are ability-specific. For example, if the selected job is Salesperson, only users in your market who have the Salesperson ability will appear as options.
Use the trash can icon to remove an assignment entry and start again when needed.
After completing the assignment fields, select the blue Add button to save the assignment.
When the assignment is saved, the assignee will receive an in-account notification. An email notification will also be sent if the assignee has enabled email notifications.
After a job or task is added, the wizard returns to the Assignments step so you can create another assignment when necessary.
2. Create Plays
The Create Plays step is an important part of setting up a Contest PRF. This is where you select the type of contest and schedule its plays.
For more information about play types, select HERE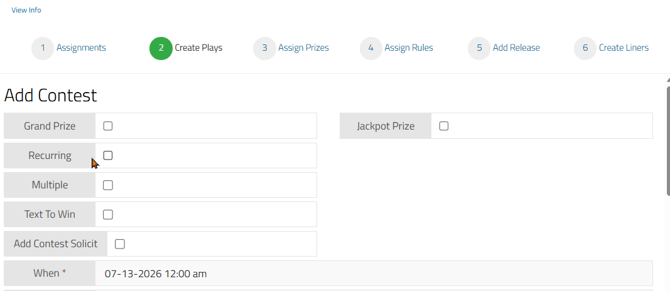
-
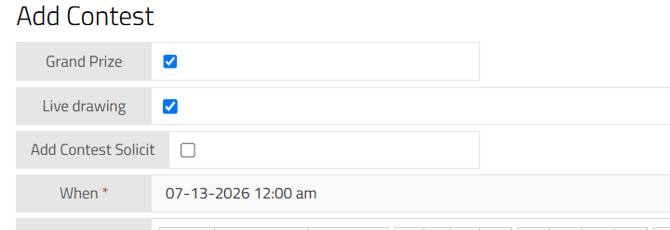
The Grand Prize play type is designed to add a final play with a grand prize attached.
For example, suppose you are giving away general-admission concert tickets throughout the week, and one of those winners will also receive backstage passes. First, create the general-admission plays and assign their prizes. Then, add a Grand Prize play scheduled after the final general-admission giveaway.
The Grand Prize workflow reviews the winners from the previous plays and selects a grand-prize winner when the ticket icon is activated. This means you do not need to select a winner manually.
Select Live Drawing to allow on-air staff to see the ticket icon on the On Air tab and initiate the Grand Prize workflow.
When Live Drawing is not selected, only users with the appropriate manager permissions can initiate the Grand Prize workflow. In that case, the ticket icon is available within the PRF details.
Important: Do not use the Grand Prize workflow when the PRF contains only one prize. This workflow is intended for a PRF that already contains other plays, prizes, and winners.
When the PRF contains only one prize, create the prize and schedule a single play for it.
For a video tutorial about Grand Prize contests, select HERE.
-
Jackpot Prize
Use the Jackpot Prize play type for a cash giveaway in which the available amount increases when there is no winner.
Enter the following information:
- Minimum: The starting jackpot amount.
- Maximum Value: The total amount available for the giveaway.
- Jackpot Increment: The amount added after each play without a winner.
- Low Quantity Warning: The remaining value at which the system should notify you that the available jackpot funds are running low.
After the Jackpot Prize is configured, on-air staff can either assign a winner or select No Winner.
Selecting No Winner instructs the system to add the jackpot increment to the next scheduled play. The system calculates the new amount automatically and displays the current jackpot amount for the on-air team.
For a video tutorial about Jackpot Prize contests, select HERE

-
Recurring
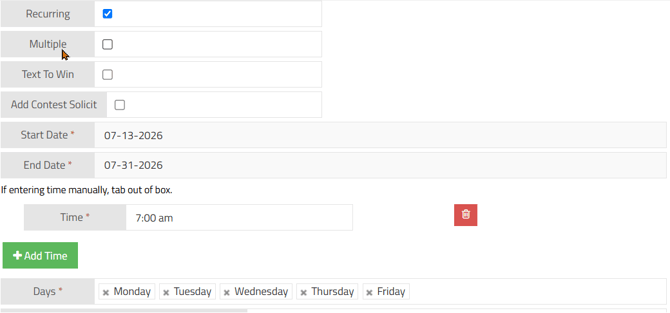
Select Recurring to create plays that repeat on selected dates, days, and times.
For example, suppose a weekday morning trivia contest airs Monday through Friday at 7:00 a.m. from July 13 through July 31. Select the applicable date range, weekdays, and 7:00 a.m. as the scheduled time.
Select Add Time to add another scheduled time.
For example, if the contest runs at both 7:00 a.m. and 3:00 p.m. on weekdays, add 3:00 p.m. as a second time.
For a contest that runs every Thursday at 6:30 a.m. for six months, create one PRF covering the six-month date range, select 6:30 a.m., and choose Thursday in the Days field.
-
Multiple
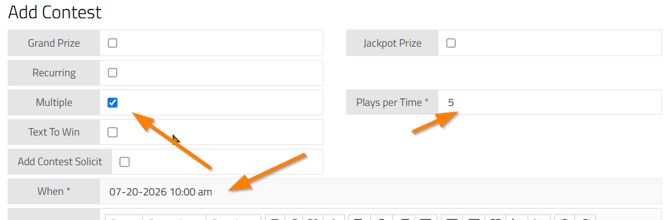
Select Multiple to schedule several plays at the same date and time.
Selecting this option opens the Plays per Time field.
For example, suppose listeners register on your website over the weekend to win concert tickets. You have five pairs of tickets and plan to select all five winners Monday at 10:00 a.m.
Select Multiple, enter five in Plays per Time, and select Monday at 10:00 a.m. in the When field.
In simple terms, Multiple means several plays occurring at one scheduled time.
-
Text to Win
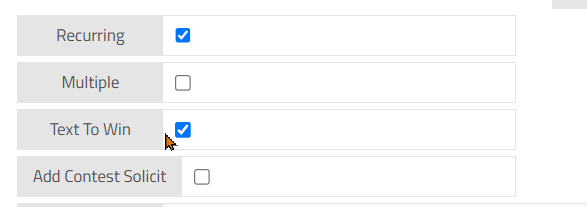
The Text to Win play type provides a specific workflow for text-message contests.
Enter the contest keyword and shortcode during setup. The keyword and shortcode can then appear automatically in the contest copy shown to on-air staff when the appropriate formatting is used.
For a video tutorial about Text to Win contests, select HERE

-
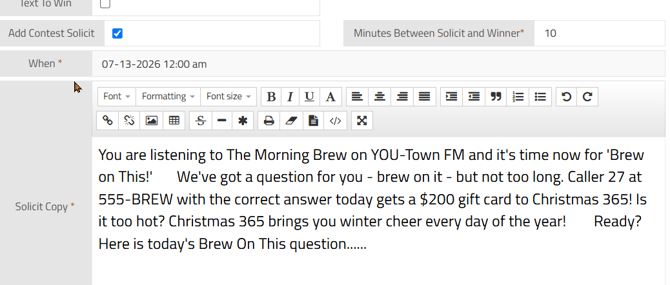
Add Contest Solicit
Select Add Contest Solicit to add a separate solicitation step before the winner is announced.
Selecting this option opens the Minutes Between Solicit and Winner field. Use this field to choose the number of minutes between the call to action and the winner announcement.
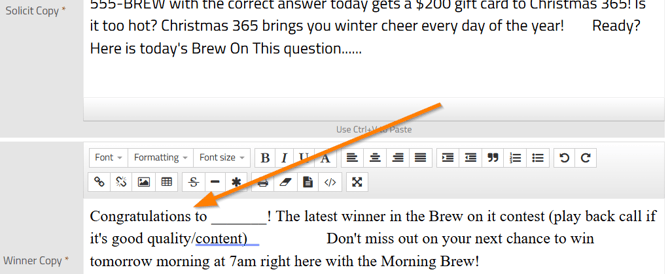
A Solicit Copy field will also appear. Enter the copy that on-air staff should use to request participation from listeners.
The Winner Copy field contains the copy on-air staff should read when announcing the winner.
For example, the solicitation may ask listeners to call immediately, while the Winner Copy is scheduled to appear 10 minutes later.
-
When
Use the When field to choose the date and time of a play.
This field appears only for single-time scheduling options, such as:
- One individual play
- A Grand Prize play
- A Multiple play
- A single Text to Win play

-
Copy
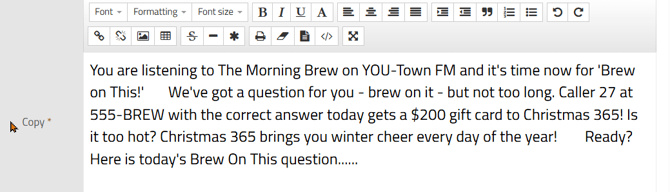
Enter the on-air copy for the play in the Copy field.
This copy will appear on the On Air tab when on-air staff open the scheduled play. It should provide a clear summary of what the on-air staff member should say.
Formatting options are available within this field.
-
Contest Notes
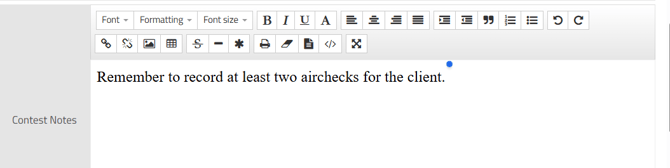
Use the Contest Notes field to provide additional instructions for on-air staff.
These notes also appear on the On Air tab.
For example, you might include a note stating that the client requires two airchecks during the week.
Formatting options are available within this field.
-
Automatically Return Prizes/Packages to the Prize Closet After Contest
Select this option to return any prizes or packages that were not assigned to winners during the promotion to the Prize Closet.
The returned quantity can then be assigned to another PRF.
When this option is selected, you may be asked whether you want to make it your default setting.

-
Off-Air Play(s)
Select Off-Air Play(s) when you do not want on-air staff to see or manage the plays.
For example, a station may run a website giveaway in which a manager plans to select five winners on Monday morning. Because the manager will handle the winner selection, the plays do not need to appear on the On Air tab.
Selecting Off-Air Play(s) hides the plays from on-air staff.
Important: An off air play cannot be edited and converted into an on air play (and on air plays cannot be edited and converted to off air plays). To make that change, delete the plays and recreate them as needed.

3. Assign Prizes
After creating the plays, use the Assign Prizes step to attach prizes to them.
-
Prize
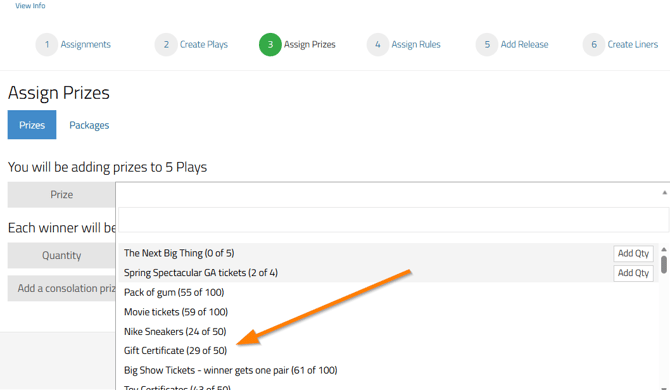
Select the Prize field to choose an existing prize from the Prize Closet.
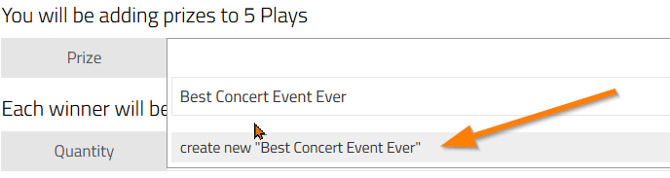
You can also enter the name of a new prize and create it during this step.
There must be enough available prize quantity to cover the number of plays receiving the prize. If the page continues to load while you are assigning a prize, verify that sufficient quantity is available.
You can add quantity to a prize from the Prize Closet. An Add Qty button may also appear in the Prize field, allowing you to add quantity without leaving the wizard.
When assigning a Prize Package rather than an individual prize, select Packages instead of Prizes.
-
Quantity
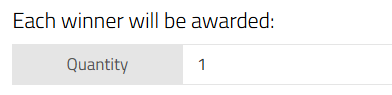
The Quantity field indicates how many units of the selected prize each winner will receive.
For example:
- Enter 1 when each winner receives one gift card.
- Enter 2 when each winner receives a pair of tickets.
- Enter 4 when each winner receives a four-pack of tickets.
-
Consolation Prize
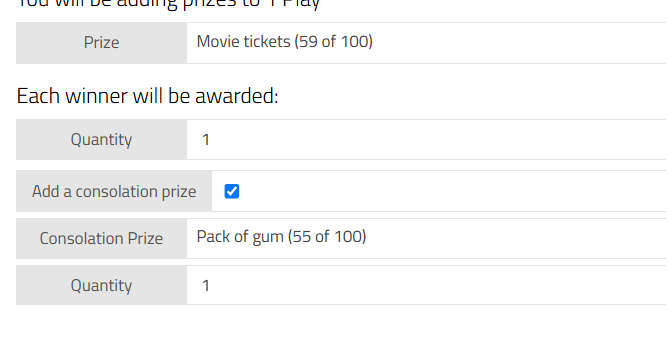
Use the Consolation Prize field to assign a prize to participants who do not win the primary prize.
For example, a listener who answers a trivia question incorrectly may still receive a station T-shirt for participating.
The Consolation Prize field uses prizes stored in the Prize Closet. Enter the quantity that each consolation-prize recipient should receive.
4. Assign Rules
After adding the plays and prizes, use the Assign Rules step to add the eligibility rules for the contest.
vPromotions uses these rules to help manage winner assignments and flag participants who may not be eligible.
-
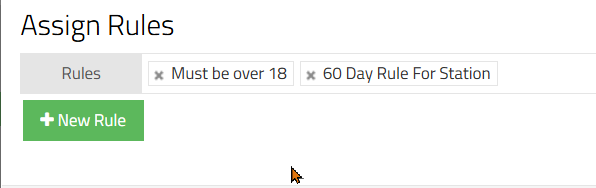
Rules
The Rules dropdown contains the rules available for the PRF’s station.
Select all rules that apply to the contest.
Rules that are already selected may be configured as default rules.
For more information about default rules, select HERE.
-
+ New Rule
Select + New Rule to create a rule directly from the wizard rather than returning to the vPromotions settings.
For a complete tutorial about Contest Rules, select HERE
5. Add Release
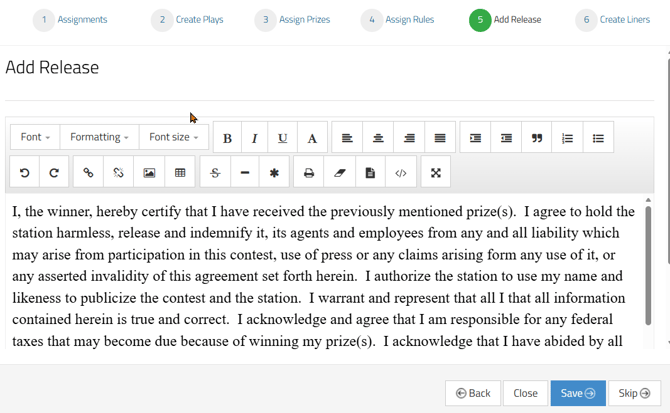
The Add Release step allows you to include and customize your station’s saved release form.
The release form is originally entered in the vPromotions settings. During this step, the saved form appears automatically and can be edited to include contest-specific information.
Formatting options are available within the release editor.
For a complete tutorial about the Station Release Form, select HERE
6. Create Liners
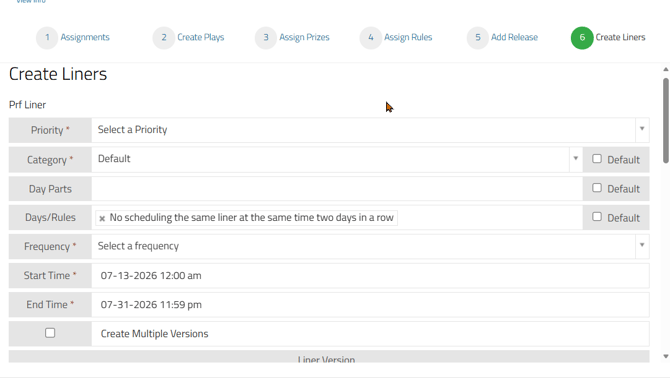
The Create Liners step is the final step in the Setup Wizard.
Use this step to create any liners needed for the contest. For a full video training tutorial on creating and scheduling Priority based liners select HERE
-
Priority
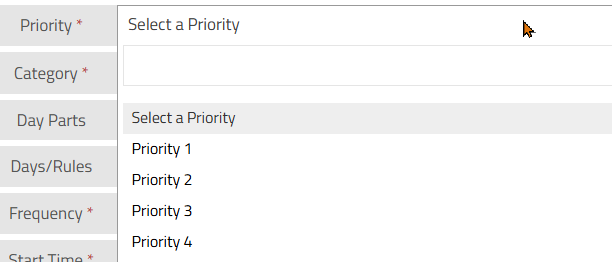
Assign each liner a scheduling priority.
This workflow is similar to a music-scheduling system. High-priority liners are scheduled before lower-priority liners and may replace them when necessary.
Use Priority 1 for liners that must air, such as client-paid liners.
Use a lower priority, such as Priority 4, for general programming liners that promote the station’s app, website, or other station initiatives.
-
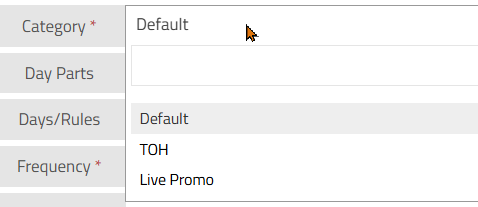
Category
Select the category in which the liner should be scheduled.
In most cases, this will be the Default category. Additional options may appear when custom categories have been created.
For more information about custom liner categories, select HERE
-
Day Parts
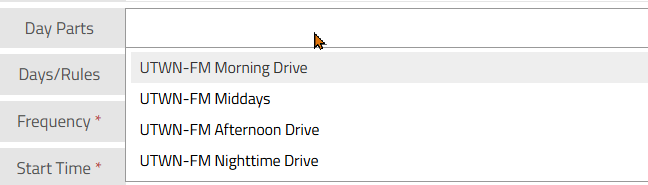
Use the Day Parts field to restrict the liner to selected dayparts.
For example, when promoting a morning-show feature, select the applicable morning-show daypart to prevent the liner from being scheduled outside that period.
The Day Parts field restricts when a liner may be scheduled. It does not instruct the system to schedule the liner at a specific time.
When no dayparts are selected, the liner may be scheduled during all available dayparts.
Dayparts are created in the vPromotions settings. If no options appear, you may need to create them.
For more information, select - HERE
-
Days/Rules
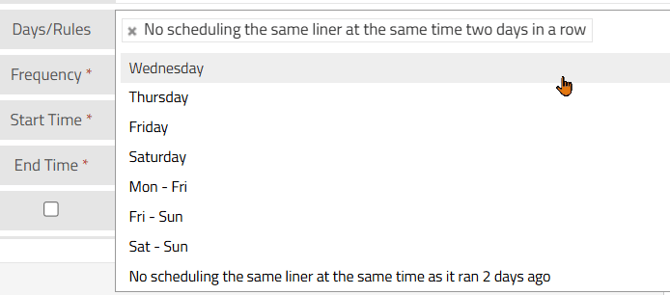
Use the Days/Rules field to restrict the liner to selected days.
For example, a liner promoting a Sunday morning countdown show may be appropriate only on Wednesday, Thursday, Friday, and Saturday.
The Days/Rules field is also a restriction tool. It does not instruct the system to place the liner on particular days.
When no days are selected, the liner may be scheduled every day during the selected date range.
The field also includes scheduling rules, such as preventing the liner from airing at the same time on consecutive days. Select any rules you want the scheduler to apply.
-
Frequency
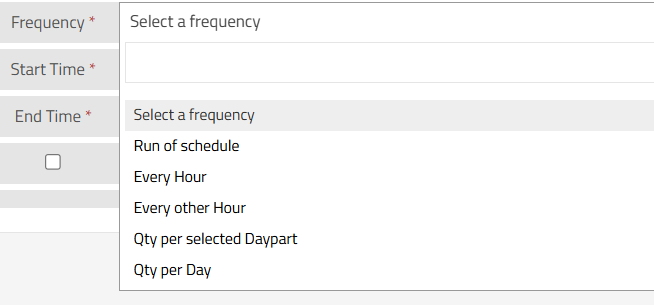
Use the Frequency field to determine how often the liner should be scheduled.
Available options may include:
- Run of Schedule: Schedules the liner in every available liner slot.
- Every Hour
- Every Other Hour
- Quantity per Selected Daypart: Use this option only when specific dayparts are selected in the Day Parts field.
- Quantity per Day: Sets the number of times the liner should be scheduled each day.
-
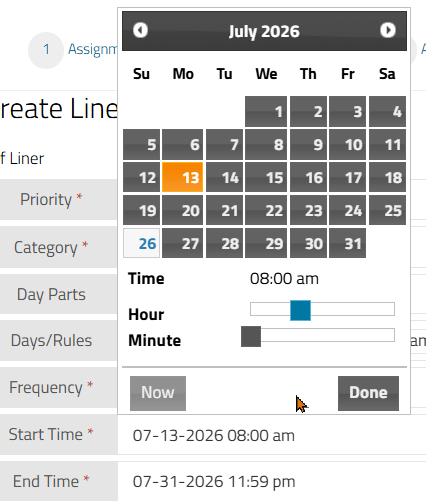
Start Time
Use the Start Time field to select the date and time when the liner should first become available to on-air staff.
End Time
Use the End Time field to select the date and time when the liner should stop being scheduled.
Both fields include a calendar for selecting the date and controls for selecting the hour and minute.
-
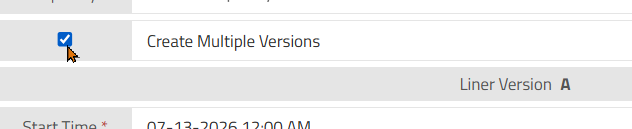
Create Multiple Versions
Select Create Multiple Versions to create more than one version of a liner.
For example, Version A may contain copy for Client A, while Version B contains different copy for Client B.
For more information about multiple liner versions, select HERE
-
Client
Enter the client that should be mentioned in the liner.
When this field is left blank, the system will use the client entered on the PRF.

-
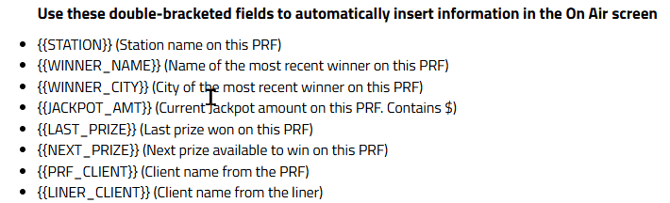
Liner Merge Fields
Liner Merge Fields appear as information enclosed in double brackets.
Use these fields to automatically insert information from the contest, PRF, or winner record into the liner copy.
For more information about Liner Merge Fields, select HERE
-
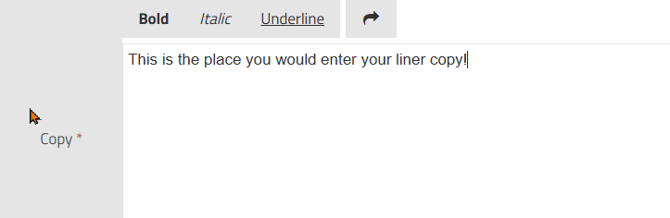
Copy
Enter the liner copy in the Copy field.
This copy appears on the On Air tab for on-air staff to read. Liner Merge Fields can also be inserted into this field.
Formatting and hyperlink options are available.
-
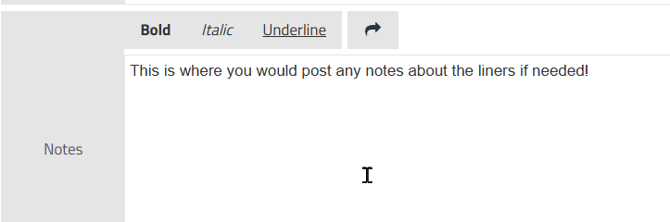
Notes
Use the Notes field to provide additional instructions to on-air staff.
For example, you might remind the team to record airchecks for the liners.
Formatting and hyperlink options are available.
Additional Buttons
View Info
Select View Info to open the PRF details while working in the wizard.
This allows you to reference the information submitted on the PRF while completing the setup fields.
After the information panel opens, the button changes to Hide Info. Select it to close the panel.
Back
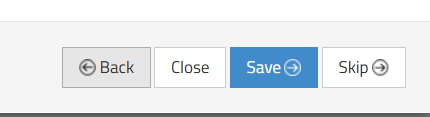
Select Back to return to the previous step in the Setup Wizard.
Close
Select Close to exit the Setup Wizard when you have finished working or want to complete the remaining steps later.
Save
Select the blue Save button after completing each step. This saves your work and advances you to the next step.
Skip
Select Skip to move to the next step without making changes to the current section.
If you have questions about the Contest PRF Setup Wizard, please contact the vCreative Support team. Email support@vcreativeinc.com or call 800-605-9889.