


1. Navigate to the Scheduling Page
-
Go to Programming > Scheduling > Scheduling in your dashboard.

2. Set Your Flight Dates
- Insert the start and end dates for when you'd like the temporary item(s) to appear.
3. Choose Your Scheduling Criteria
-
Under "Schedule These Items," select the item types you'd like to schedule (e.g., contests, liners, promos).
-
This method works best using the "Let Me Do It (Manual)" scheduling method, but it is compatible with other scheduling options as well.
-
Click Submit to continue.

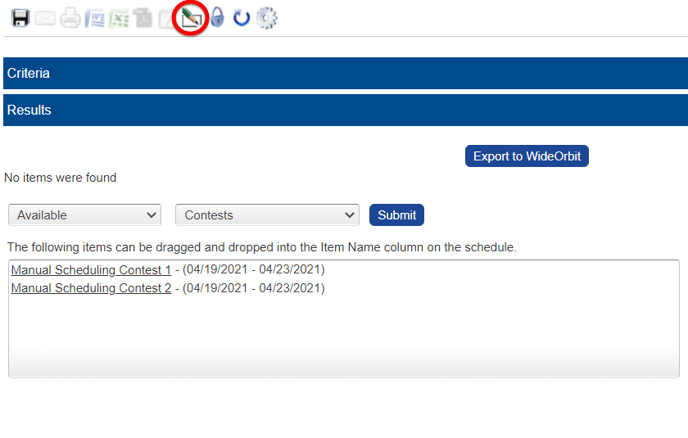
When PromoSuite Next is done processing your request you will be taken to a page that says "no items were found" (if this is your first contest scheduled for the date range). If previously scheduled contests exist they will appear on this page instead.
- If you do not have contest slots in your scheduling clock, go to Option 1: Manual Insert
5. Insert Items Manually
-
On the toolbar, click the "Manual Insert" button (icon looks like a pencil and paper).
-
Under "Choose an Item Type to Add," select the type of item you’d like to insert.
Note: You will only be able to select from the item types you previously chose in your scheduling criteria.
 6. Select the Specific Item
-
Choose the specific item (e.g., a contest name) that you want to schedule.
7. Add Temporary Slots
-
Under "How Many to Add," enter the number of temporary slots you wish to create.
-
Click Add.

8. Fill Out the Slot Details
-
For each blank slot, fill in the following:
-
Date
-
Time
-
AM/PM
-
-
After filling out all slots, click Apply.

9. Finalize and Save
-
Your temporary slots will now appear in the scheduling clock for the selected dates and times.
-
Don’t forget to Save and Finalize your scheduling clock to ensure all changes are retained.
