


Follow the steps below to create a new schedule clock.
Start by clicking on the set up & utilities icon (1), then click on scheduling/daypart option in the menu (2) and click on scheduling clocks (3).

Creating your Clock
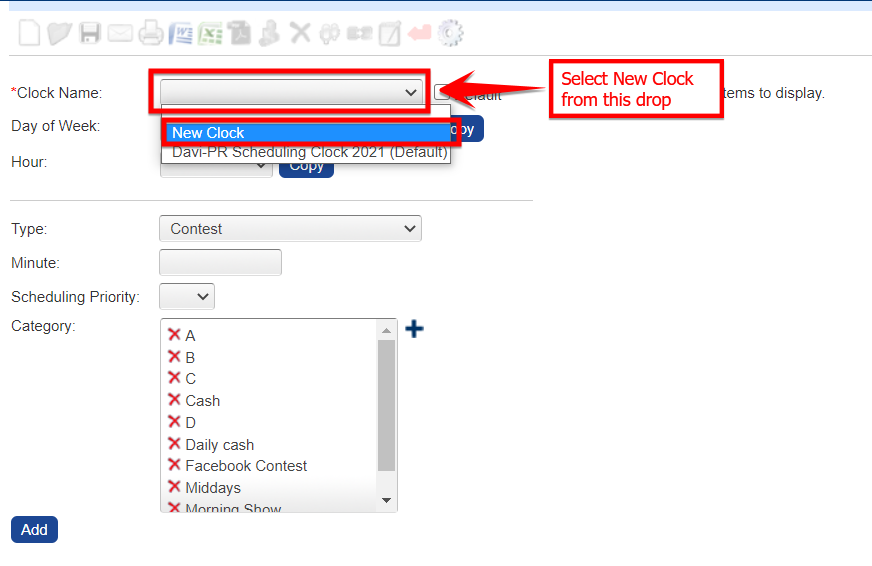
Begin by clicking on the clock name drop down and select "New Clock."
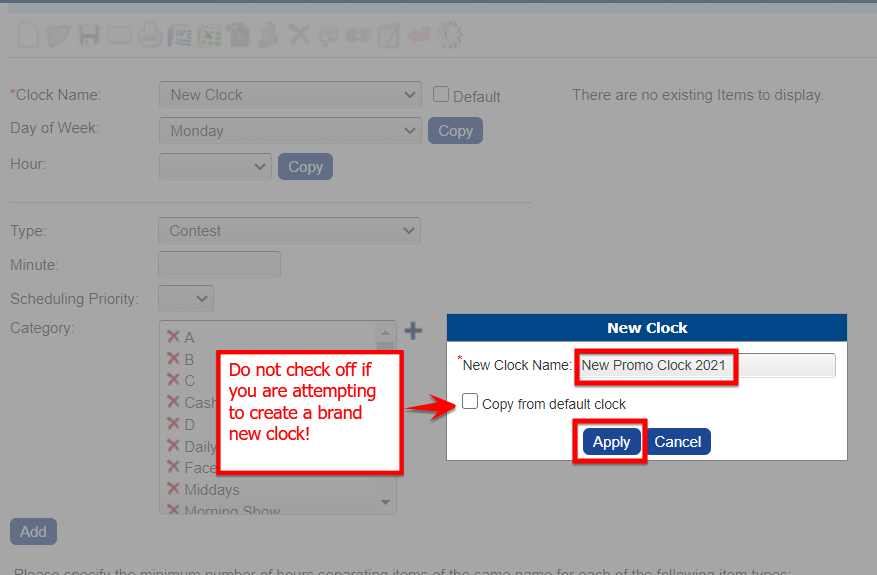
You will be prompted to give your clock a name. Give your clock a name then click apply.
Now you can begin to fill out the "named" scheduling clock you have just created. You have the option to build your clock out one day at a time, Monday through Friday, or work on weekends only.
- Select the day of the week you would like to work on first from the drop down (1).
- Choose the hour you want to build out first (2).
- Choose the type of item you would want to add a time slot for (3).
- Select the minute on the hour - add anything from 00 to 59 without the colon (4).
- Assign a scheduling priority (5).
- Click Add (6) and then at the top of the page click Save (7).
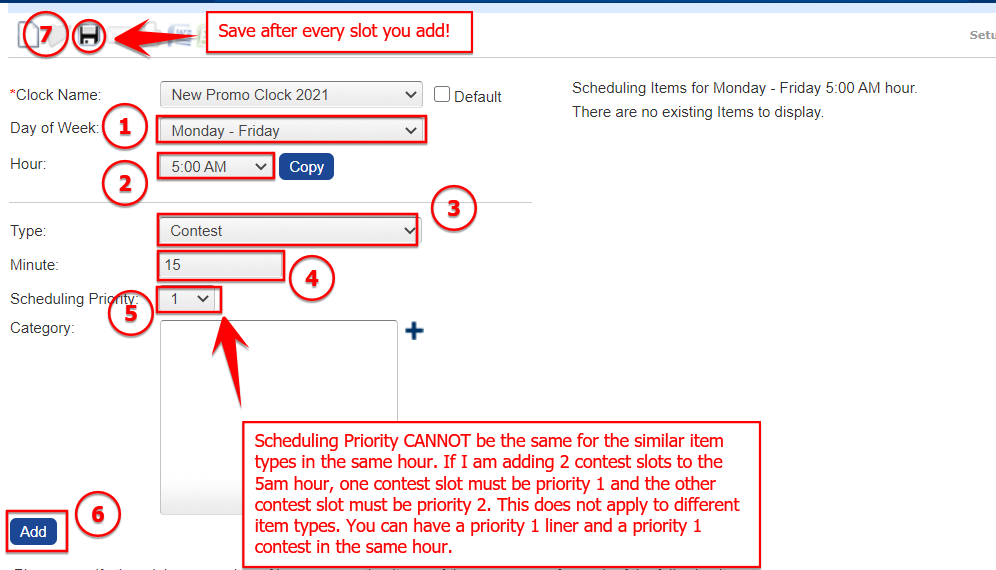
Note: Scheduling Priority must be unique for each item type within a particular hour. For each item type we recommend adding your highest priority item first and making it priority 1, then going on to the second priority item and making it priority 2, and so on.
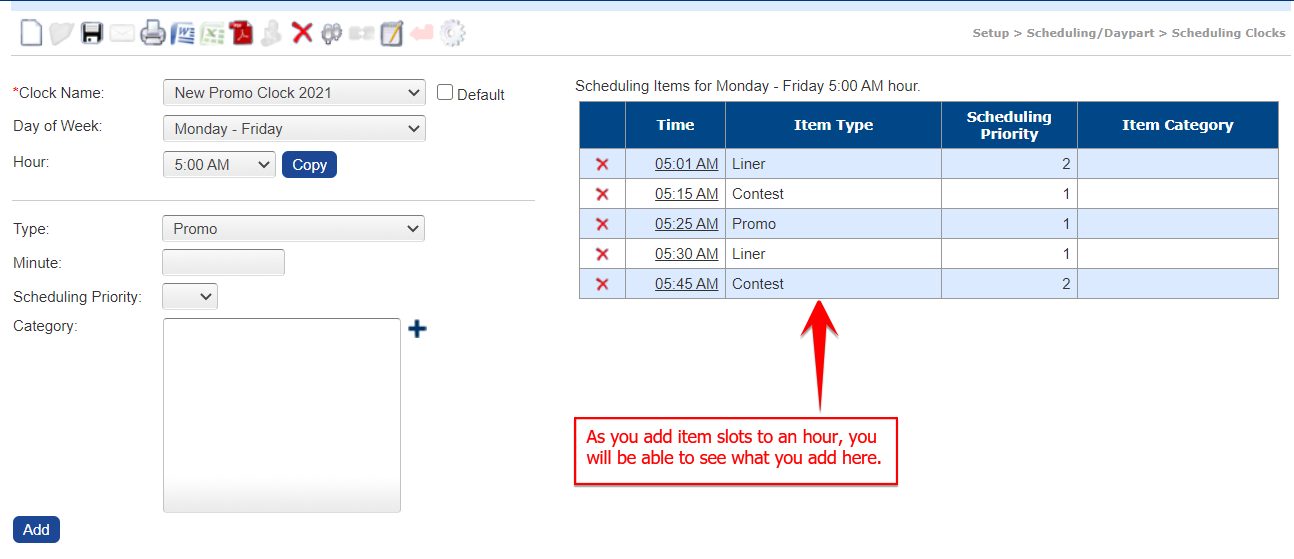
After you have added an item to your clock you will see it appear in the list of scheduled items.
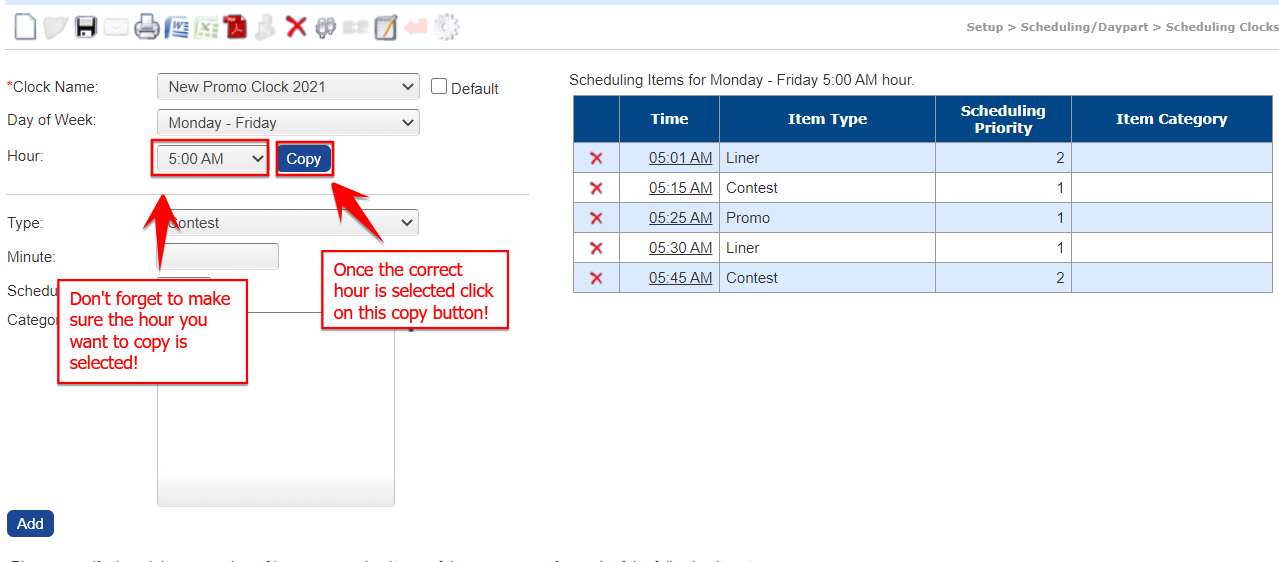
Copying One Hour to Another
Once you have built an hour in your scheduling clock you can copy it over (duplicate it) to other hours, if you have other hours that will feature the same clock.
- Select the hour you wish to copy, from the drop down menu.
- Click Copy.
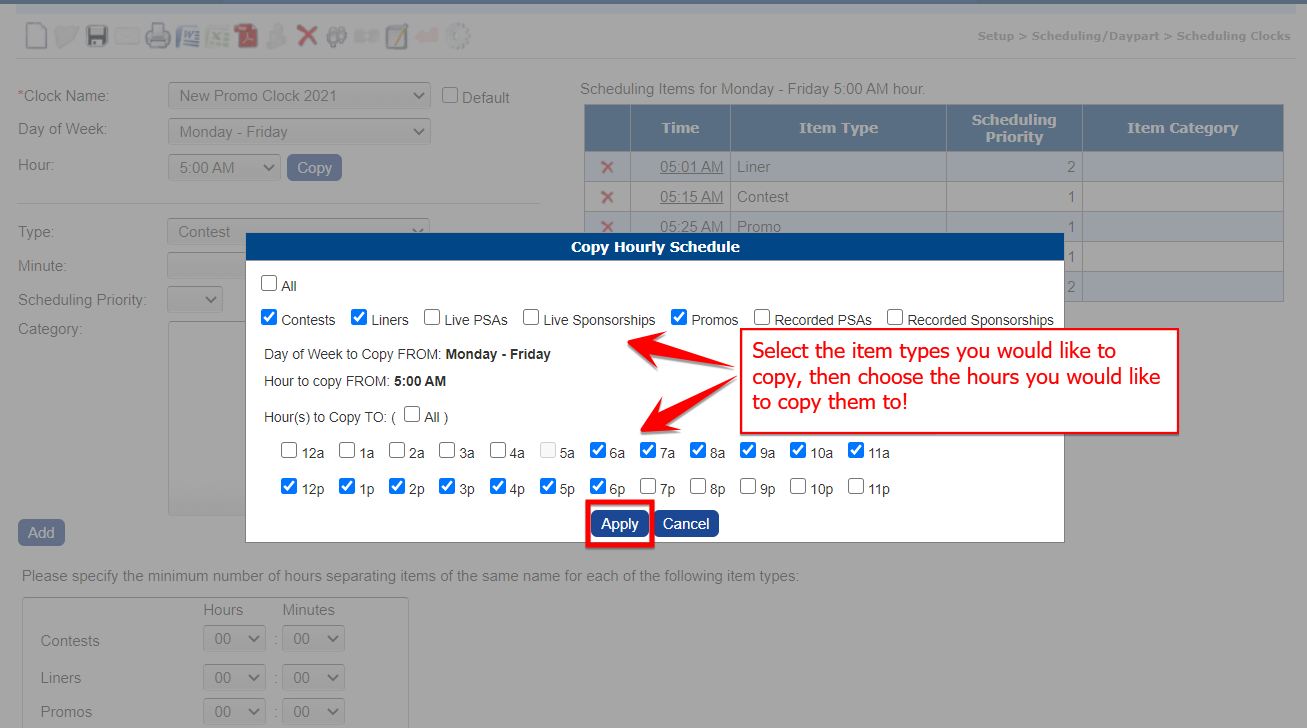
- In the pop-up window that appears, choose the item types you want to copy, then select the other hours you wish to copy them to.
- Click Apply.
- Then click the Save icon at the top of the page
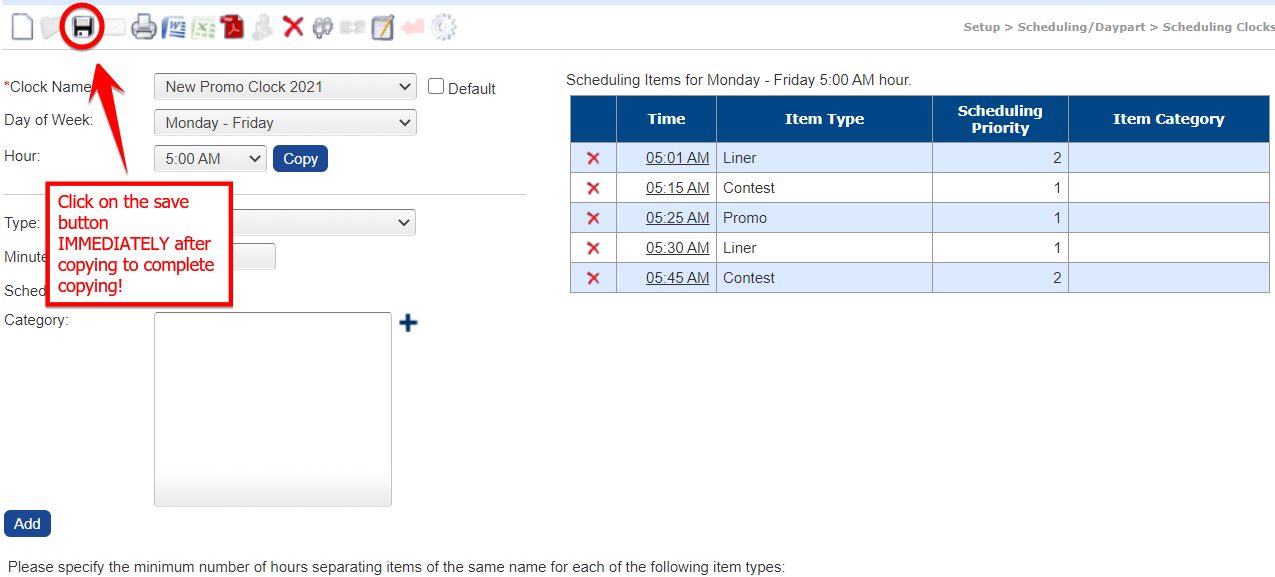 The hours you selected will now contain the item types you copied over!
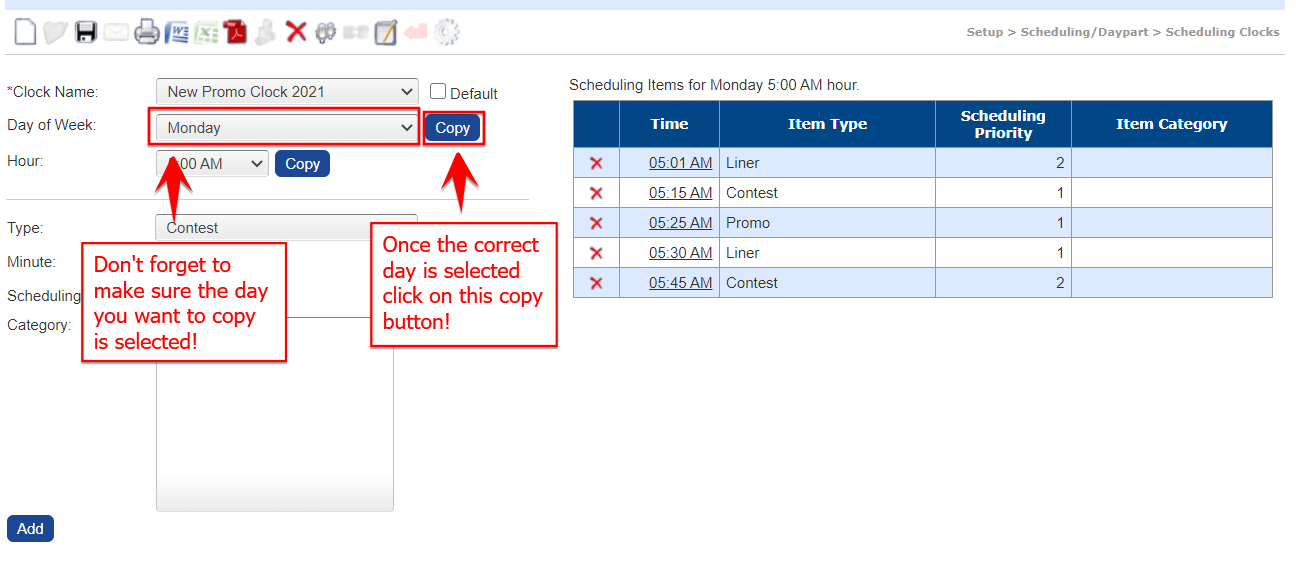
Copying One Day to Another
Once you have built a day in your scheduling clock you can copy it over (duplicate it) to other days, if you have other hours that will feature the same clock.
- Select the day you wish to copy, from the drop down menu.
- Click Copy.
- In the resulting pop-up screen, select the item types you wish to copy - then - select the other days you wish to copy them to.
- Click Apply.
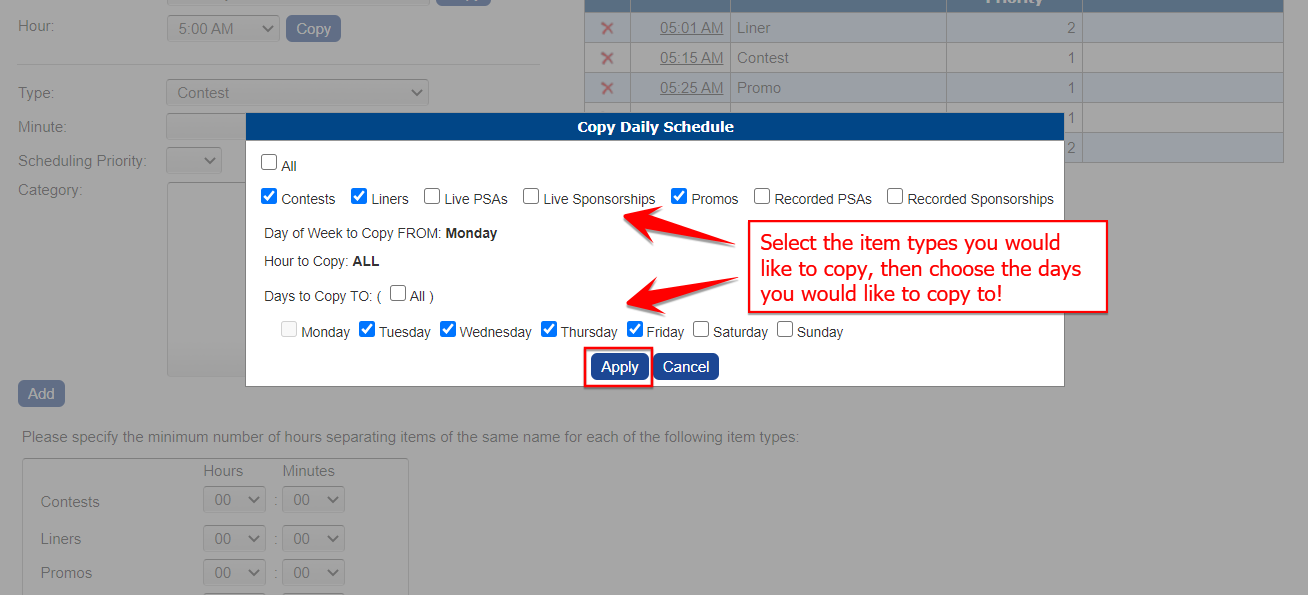
- Then click the Save icon at the top of the page.

The days you selected will now contain the item types you copied over!
Setting a New Clock as your Default Clock
In order for the items in your new clock to be scheduled, you must set your new clock to be your default clock. When you are ready to use your new clock:
- Check the Default box next to the clock name you wish to make the default clock (1).
- Click the Save icon (2).
PromoSuite Next will begin using this clock to schedule events moving forward!
